Simon Taxi-Instamojo Payment Gateway Documentation
For Quick Support : Skype ID: digishelp
1|Plugin Installation
When you are ready to install a Plugin, you must first upload the Plugin files and then activate the Plugin itself. The Plugin files can be uploaded in two ways:
- FTP Upload: Using your FTP client, upload the non-zipped Plugin folder into the /wp-content/Plugins/ folder on your server.
- WordPress Upload: Navigate to Plugins -> Add New -> Upload. Go to browse, and select the zipped Plugin folder. Hit "Install Now" and the Plugin will be uploaded and installed.
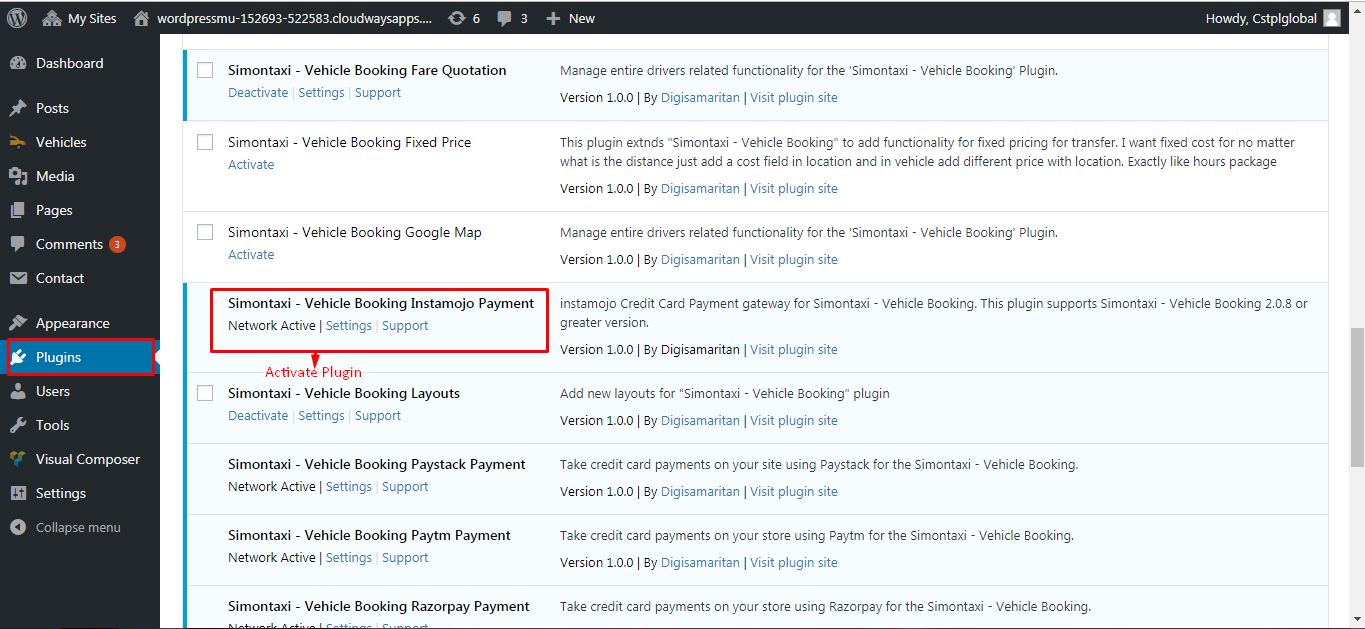
Once the Plugin is uploaded, you need to activate it. Go to Plugins -> and activate your Simontaxi Vehicle Booking Instamojo Plugin.
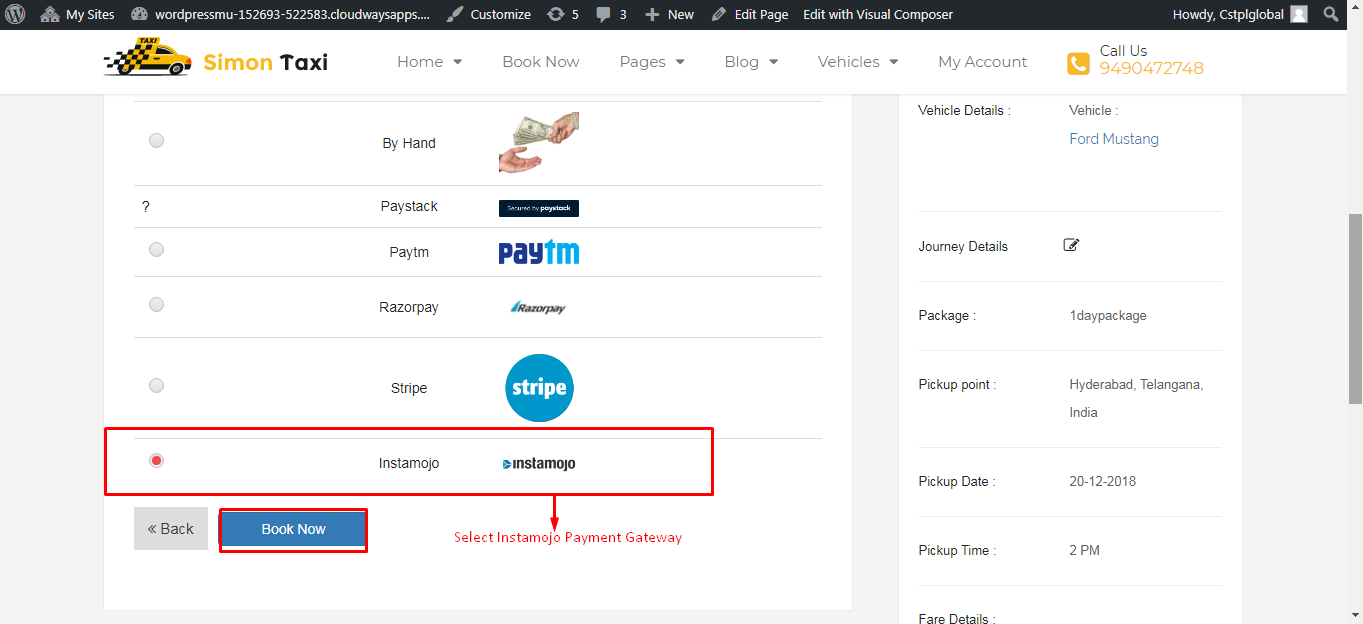
2|Instamojo Payment Gateway
India's emerging C2C payments & e-commerce platform.
We make digital commerce universally accessible to create new opportunities & sustainable livelihoods.
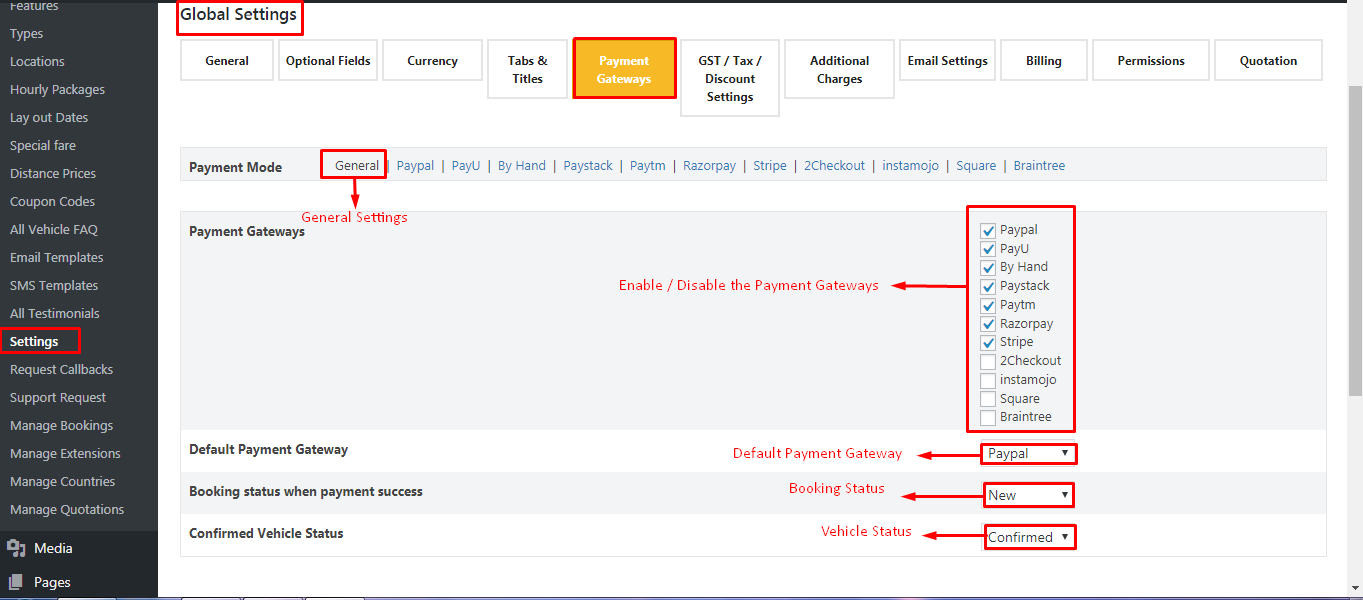
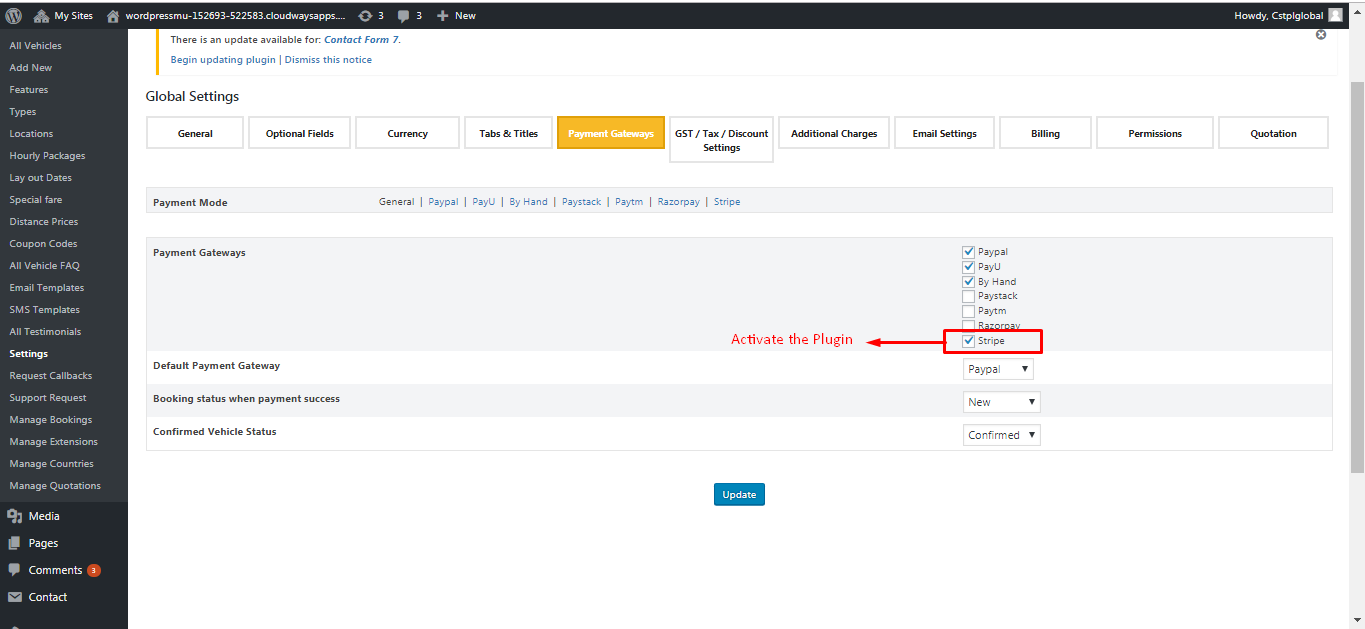
Admin can enable/disable Payment Gateways. Visit the Simontaxi-Vehicle Booking settings page, and click on the Payment Gateways tab
Instamojo
Once buy this plugin activate the plugin from WP admin (Plugins -> Installed Plugins ) to configure.
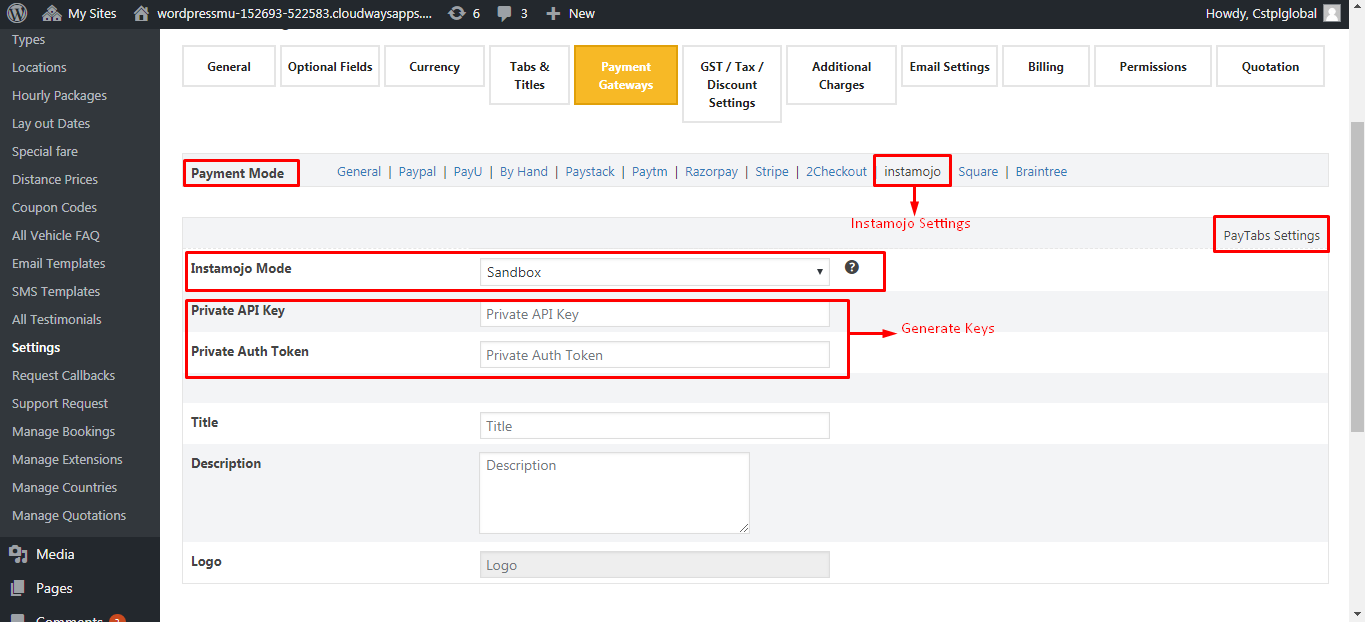
Then visit Vehicles -> Settings -> Payment Gateways here you will find Instamojo Payment gateway.
Enter your credentials in the settings page
It will be available in the front end for booking
3| Contact
For Quick Support : Skype ID: digishelp
For More Simontaxi Plugins: https://digisamaritan.com/product-category/plugins/
For More Simontaxi FAQ'S: https://simontaxi.wptaxitheme.com/faq-new/